Showing posts with label Hanky Rag Quilt. Show all posts

Friday, July 15, 2016

Two Lessons about Handerchief Rag Quilts

A while back I got an order for Two Hanky Rag Quilts.  The customer would be sending me her vintage hankies to make two quilts for her nieces.  I didn't give it a second thought until I saw her hankies.  UH OH!  Almost all of them were either all white or mostly white with a small bit of embroidery on a corner.


It was easy to divide the hankies into 2 groups since they were so similar.  My dilemma was making these hankies stand out.  I know that white hankies on the normal white background makes for a boring quilt.  I also know that backing white hankies with any color changes the color of the hanky and I like to keep the true colors.  So here's what I did.

I cut a piece of white muslin a little bit smaller than the hanky and centered it beneath the hanky.  This would keep the hanky color white no matter what colors came next.

For the first quilt I used a printed fabric featuring rosebuds.  I layered the hanky with the muslin centered on top of the rosebud squares.  I saw that you still could see the fabric print underneath the hanky.


I knew all the squares were going to be 16".   What I had to do was make a frame with the muslin and the rosebud fabric so that only the white muslin was directly under the hanky and strips of the rosebud fabric were sewn around the the muslin.


 Then I placed that square onto two layers of very light pink flannel squares securing all the layers with the traditional X.


In the end I thought the white-ish hankies were still not highlighted in the best way since the rosebud fabric was also light white.  (Luckily the customer loved how the first quilt turned out.)


The second quilt I did the same way except this time I put a pink flannel under the hanky with the muslin beneath and I used the rosebud fabric on the back.

This was what I was looking for!  This really highlighted the hankies and no pattern showed through.


One problem solved however, for this quilt I had another entirely different dilemma. The majority of the hankies were the same size around 13 - 14" so they fit nicely onto the 16" squares.  There were two very large hankies that were larger than 16".  I thought I would have to make all the squares 18" to accommodate those 2 hankies or cut the two hankies.  Both options I did not want to do.

I ended up folding two of the edges of the large hankies in such a way that it still kept the design intact and then sewing the fold in place.  You can kind of see what I did here.


Here is the final result for the 2nd quilt:


 So two hanky rag quilts done.  Two lessons about white hanky rag quilts learned.

Saturday, August 8, 2015

Here's what I'm doing today 8/8/15

Today I will try to finish the hanky rag quilt I started yesterday.  I have one more row to sew together and then I need to sew all 5 rows together.  I won't be able to complete it until the embroidered square is finished.   I'd also like to start cutting the squares for a smooth patchwork baby quilt.  It's a little out of my comfort zone but it's the next quilt on my list.


 Yesterday the fabric did arrive for the Wee Wander rag quilt so I finished sewing that one.  I cut most of the seams earlier and finished up the cutting  last night.


 I finished the pouf for my grand daughter.  This one was harder than the square pouf and looks a bit wonky.  It was my first time using piping and sewing it around a circle was what made it more difficult.  The piping did give it a finished look.


Saturday, October 12, 2013

3 Reasons Why Hankies Make Beautiful Rag Quilts

         I am working on an order of three Rag Quilts made from large, medium and small vintage hankies.  As I go through the process I am finding that there are at least 3 reasons why hankies make the best, if not the most beautiful rag quilts.

1.  They are already square.
You don't even have to cut them in any way so that saves a step in the quilting process.

2.  No matter how you arranged them, they always look perfect.
You can put different colors or patterns together and they never clash.

3.  Hankies are beautiful works of art to begin with so your quilt is guaranteed to turn out beautiful.
I think hankies are exceptionally beautiful, but extremely undervalued works of art, especially the floral hankies.  They are delicate, soft and oh so feminine.  Each square on a hanky rag quilt will be a "framed" (in fluff) beautiful work of art.

Here is the first of the three Hanky Rag Quilts that I have finished and the WIP's of the other two.


 Here is the layout for the medium hankies WIP


Layout for the small hankies WIP

Monday, January 28, 2013

How to make a Handkerchief Rag Quilt

This is my first tutorial and my first multi-size handkerchief rag quilt.

  I usually collect hankies until I have enough of the same size and simply put them together in the normal way for a rag quilt but I had so many hankies of various sizes that I was not using because I didn't have enough of a particular size.  I wanted to figure out a good way to make the quilt using all the different sizes.  I thought I could put a small size next to a big size and it would all work out in the end but the seams didn't match up and I didn't like the look so here is what I did instead.

Step 1:  Sort and organize your hankies as to size.  I have an 11" pile, a 12 - 12 1/2" pile, a 13 - 13 1/2" pile and a 14" and above pile.


Step 2:  Iron each hanky and inspect for yellowing.  The ironing will help you get the correct measurement.


If your vintage handkerchiefs look yellowed you can try a trick I found on Pinterest that really worked.  I found it here.   I wish I had taken the "before" picture of this hanky I tried it on but here is the "after."  It looks amazing!


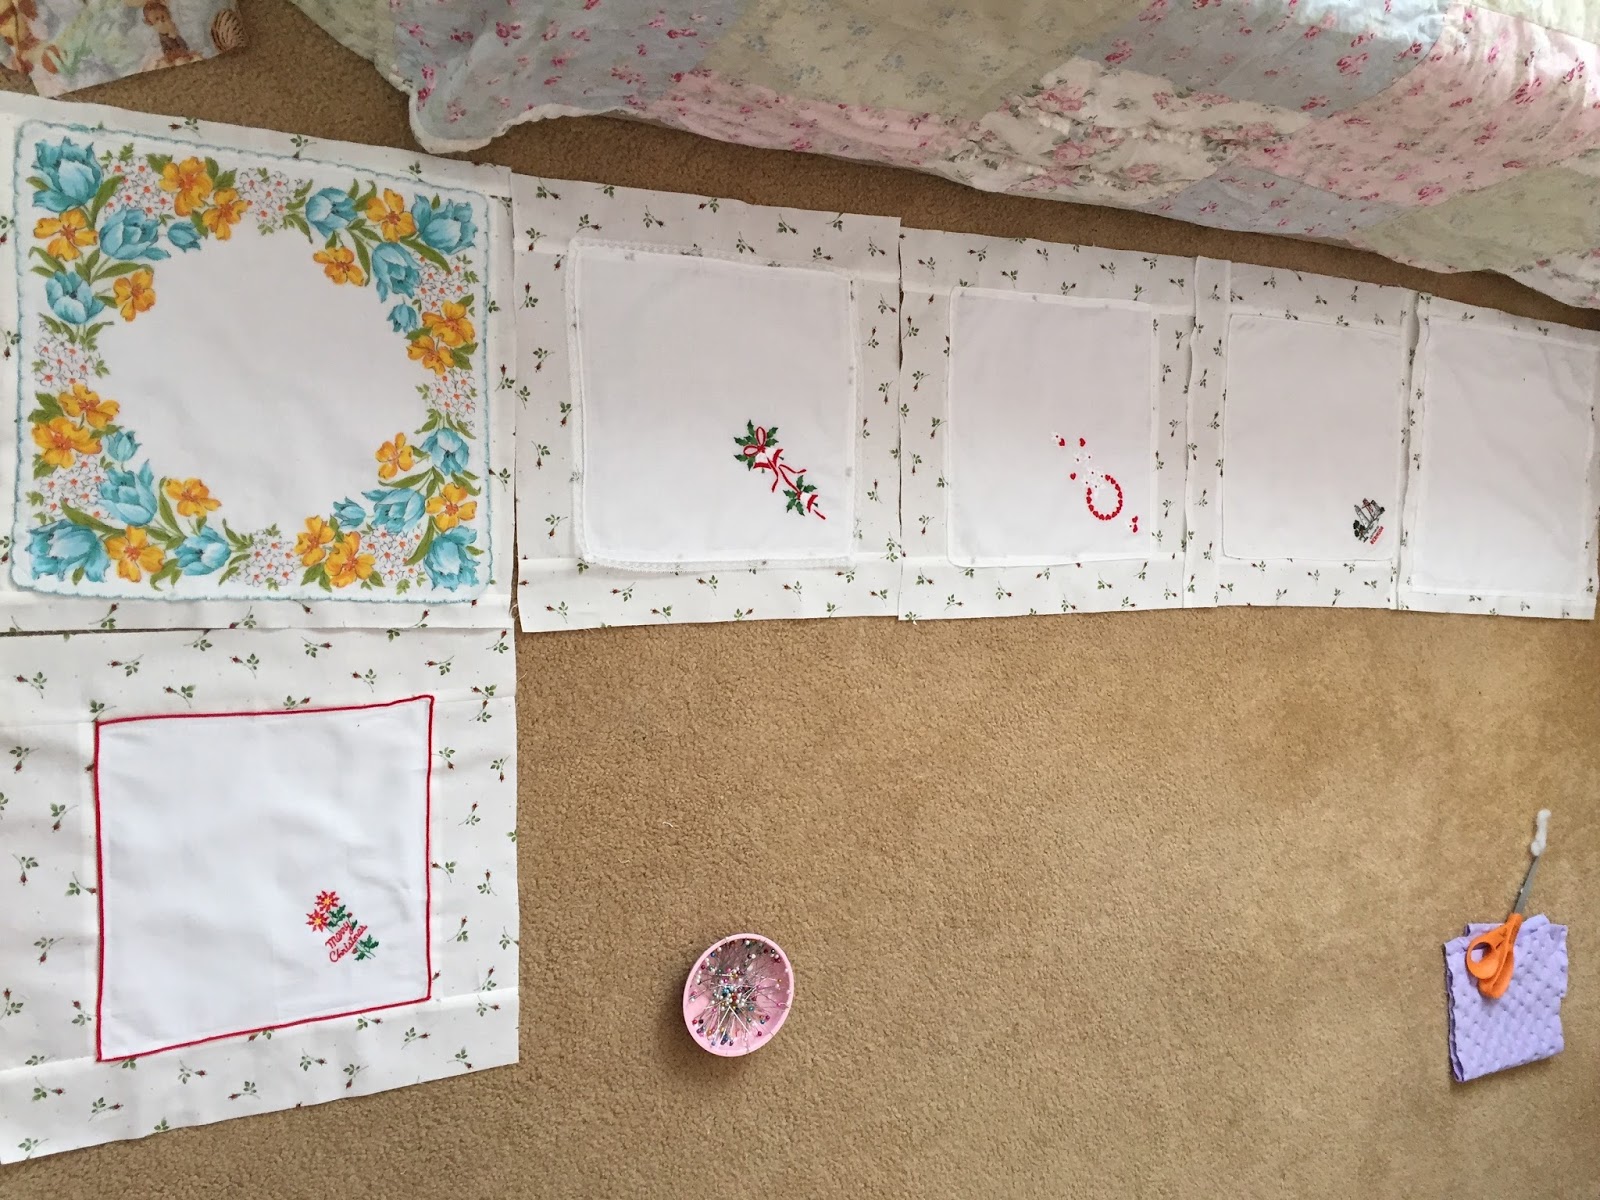
Step 4:  Layout your hankies in the array you want them to be in for your quilt alternating the sizes.


Step 5:  Take a picture of your layout.  You don't really have to do this step but I find that my cats love to mess up my layouts.  The pictures have saved me many times.  Pick up the hankies by row so it will be easy to sew in the right order.


Step 6:  Select the largest size hanky and cut your flannel that same size.  I am using flannel and fleece for this rag quilt.  I like to use fleece with the very delicate hankies to give the quilt a nice weight.  I cut my flannel and fleece squares 13 1/4".  (The 1/4" was just my insurance.)


Step 7:  Layer the hanky and the flannels (and fleece if you are using it).  I've made hanky quilts with just a hanky and two slices of flannel and it turns out beautifully.  For this one I layered hanky, flannel, fleece and flannel.  If the hanky is close to the size of the flannel squares then simply sew your traditional X through all 3 or 4 layers.


If your hanky is smaller than an inch from the edge of the flannel like this:

 Pin it


 Sew it onto just the first layer of flannel


Like this


Then layer the other fabrics and sew through all the layers with the traditional X like this


Step 8:  When all the smaller hankies are sewn onto flannel and layered and all the hankies are sewn with an X, now you can begin to assemble the quilt.  Alternate the small hankies with the large hankies as you did in the original array and sew them together in a row.  I used a one inch seam on mine for a very fluffy look.


Step 9:  Sew all the rows together matching the seams as you go.


Step 10:  Sew around the perimeter of the quilt.  I do a double perimeter seam for added strength and I think it looks pretty too.


Step 11:   (Gently lift cat off quilt)  Clip all the seams as you would any rag quilt.  


Step 12:  Machine wash your quilt.  With Hanky quilts I use a delicate setting and dry on low.  They wash up beautifully and this last step helps to give a nice full fluffy look to your seams.  Admire your results:


Update 2/23/14

I have sometimes cut through the hanky edge as part of the fluffy seams but if you don't want to cut into your precious hankies, make all your flannel squares 1" larger than your largest hanky.  Sew down each of your hanky edges onto the first layer of flannel.  When you sew the squares together you will only be snipping the flannel, not the hankies.

Most of my hanky quilts are made with 3 layers of white flannel.


Update 10/18/15
I recently made a vintage hanky quilt for a customer and I tried something different that I will continue to do.  I sewed the hanky onto white muslin  instead of flannel and then layered that square with the normal middle and backing in white flannel.  I loved the look and the feel of the muslin and it didn't change the fluffy seams at all.  It gave the whole quilt a nice fresh sheet feel.  Here's a picture:

Update 4/3/16
Check out the revised Step 12.  Thank you to Judy for reminding me of this very important (previously missing) step.

Update 4/23/16
Here is my latest hanky quilt. This one I made a heart design with the hankies.   I'm posting it to show what the back looks like.


Update 8/1/19
I just read through this post to see if what I had written way back in 2013 was still the way I make these quilts.  I have made sooo many since then and I do everything almost the same way BUT now I find the largest hanky and I cut my muslin 2" larger.  This ensures that I will not cut into any of the hankies when I cut the seams.  I also always do my hanky quilts with 4 layers - hanky, muslin, flannel, flannel. No more fleece unless someone asks for that.